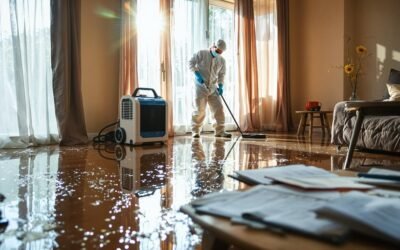
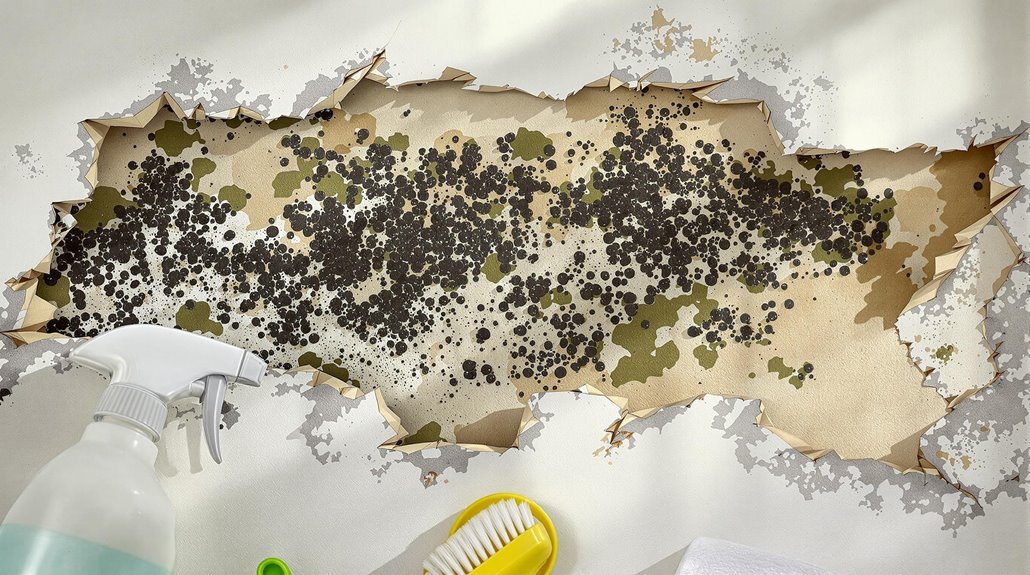
When mold grows on drywall after water damage, start by identifying and addressing the moisture source. Inspect for leaks and use a moisture meter to assess damp areas. Wear gloves, goggles, and a respirator for protection, and guarantee good ventilation. Cut out the affected drywall at least a foot beyond the mold. Seal and dispose of the moldy pieces. Dry the area thoroughly with fans and dehumidifiers. Finally, to prevent future growth, use mold-resistant materials and monitor humidity levels. If you want to guarantee the best results, you'll find helpful strategies in the following sections.
Key Takeaways
- Identify the source of moisture and fix any leaks to prevent further mold growth.
- Wear protective gear like gloves and masks when handling moldy drywall.
- Cut out and dispose of affected drywall, ensuring to remove a foot beyond visible mold.
- Use HEPA-filter vacuums and cleaning solutions to thoroughly clean the area before replacement.
- Maintain low humidity levels and regularly inspect for signs of mold recurrence post-remediation.
Identify the Source of Moisture
When dealing with mold on drywall after water damage, the first step is to identify the source of moisture, as this is crucial for effective remediation. Start by inspecting for visible leaks, which can stem from plumbing issues, roof damage, or faulty windows. Check areas with high humidity, like bathrooms and kitchens, where moisture sources are common. Don't overlook hidden leaks behind walls or under floors, as these can likewise contribute to persistent moisture. Using a moisture meter can help you pinpoint damp areas. Once you identify the moisture source, you'll know how to address the underlying issue, preventing further water damage and mold growth. Effective remediation hinges on controlling these moisture sources before tackling the mold itself. Additionally, it's essential to take preventive measures to avoid future water damage that can lead to mold growth.
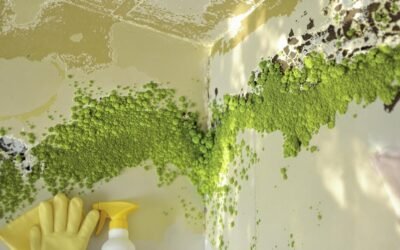
Assess the Severity of Mold
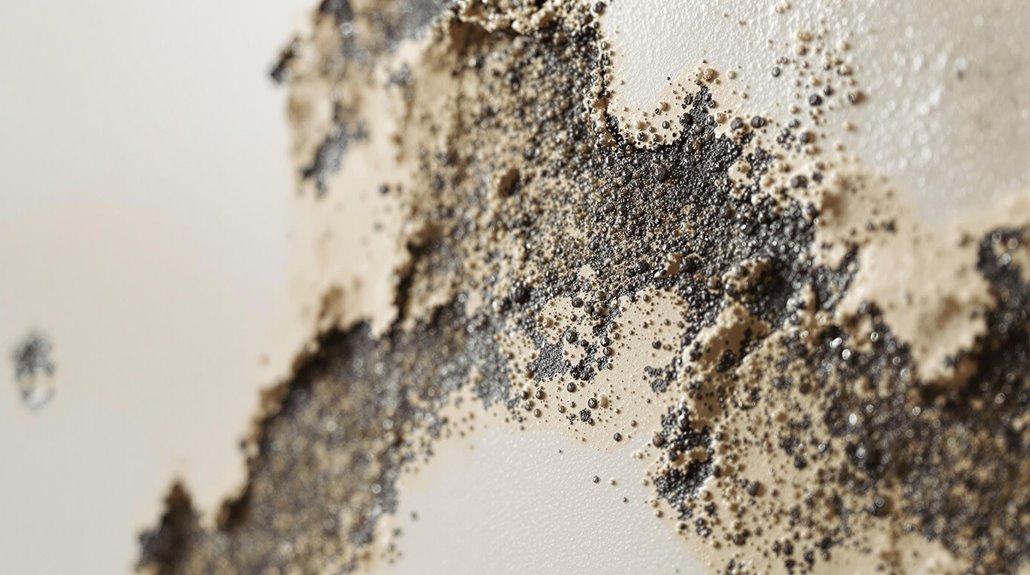
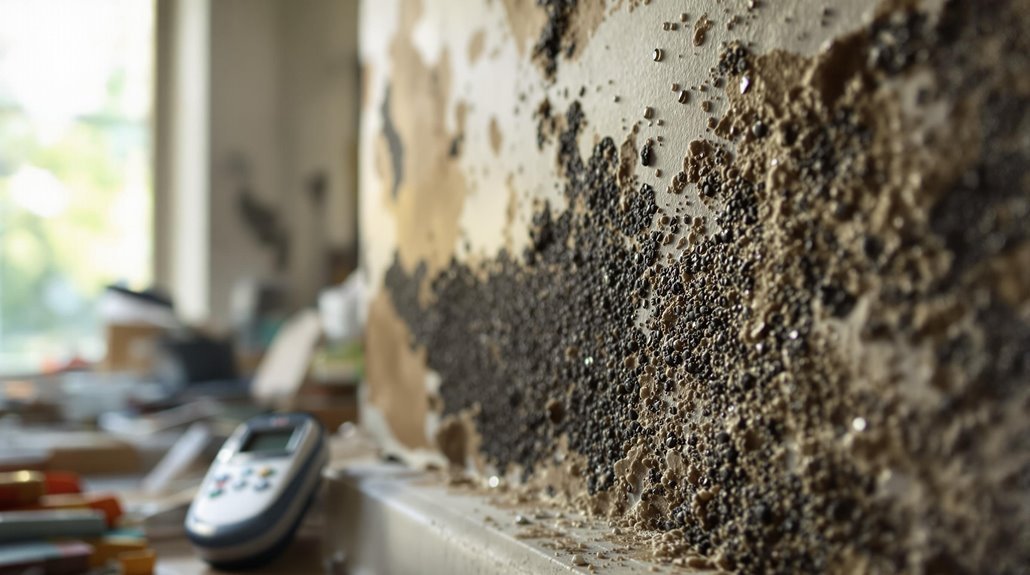
How can you determine the severity of mold growth on your drywall? Start by visually inspecting the affected area. Identify mold types; common ones include black mold, which poses significant health risks, and green mold, typically less harmful. Check the size of the mold patches—small spots may indicate a minor issue, while large, widespread growth suggests a more severe problem.
Next, assess the depth of the infestation. If the mold has penetrated beyond the surface, it can compromise your drywall's integrity. Look for signs of water damage, like discoloration or warping, as these can indicate prolonged exposure. Finally, consider any health symptoms experienced by occupants, such as respiratory issues or allergies, which could signal a more serious mold problem requiring immediate action. Additionally, it's crucial to contact professionals for emergency water removal services, as they can help mitigate further damage and address mold growth effectively.
Gather Necessary Safety Gear

Before tackling mold on drywall, you need to gather vital protective equipment like gloves, goggles, and a respirator to shield yourself from harmful spores. Make sure you likewise set up proper ventilation techniques, such as opening windows and using fans, to maintain air circulation and reduce inhalation risks. Equipping yourself correctly is critical for your safety and the effectiveness of the remediation process.
Essential Protective Equipment
As you prepare to tackle mold on drywall after water damage, verifying you have the right protective equipment is crucial for your safety. Using appropriate protective gear not only minimizes health risks but additionally improves your ability to effectively manage the situation. Here's a quick reference table for vital items:
| Protective Gear | Purpose | Notes |
|---|---|---|
| N95 Respirator | Filters airborne spores | Verify proper fit |
| Safety Goggles | Protects eyes from irritants | Use with a face shield if needed |
| Latex or Nitrile Gloves | Prevents skin contact | Change frequently |
| Tyvek Suit | Protects clothing and skin | Consider disposable options |
| Rubber Boots | Keeps feet dry and protected | Verify non-slip soles |
These safety measures will help you navigate the mold remediation process with confidence.
Proper Ventilation Techniques
Guaranteeing proper ventilation is key when dealing with mold on drywall after water damage. Start by opening windows and doors to promote natural air circulation. If the outside humidity is low, use exhaust fans to expel damp air from the affected area. Consider portable air purifiers with HEPA filters to capture mold spores and improve indoor air quality. For large spaces, industrial fans can be effective ventilation methods, promoting airflow and drying out moisture-laden materials. Maintain a consistent airflow for at least 48 hours, monitoring humidity levels with a hygrometer. Finally, verify any air conditioning systems are functioning properly, as they can help dehumidify and circulate air, further preventing mold growth.
Prepare the Affected Area
Start by identifying all sections of drywall that are affected by water damage and mold growth. Make certain the area is well-ventilated by opening windows or using fans to reduce moisture levels. This preparation will create a safer environment for the cleanup process.
Identify Affected Sections
Identifying the affected sections of drywall is vital after water damage, since mold can develop rapidly in damp environments. Start by using mold detection techniques such as visual inspections and moisture meters to pinpoint problem areas. Look for discoloration, bulging, or peeling paint, which often indicate mold growth. Employ drywall inspection methods like tapping or probing the surface to check for softness or water saturation. Don't forget to inspect behind baseboards and in corners, as these areas can harbor hidden moisture. Document your findings clearly, noting the severity and extent of the damage, so you can devise an effective remediation plan. This thorough assessment is critical in addressing mold issues effectively and preventing further damage.
Ensure Proper Ventilation
While evaluating the water-damaged area, it's vital to prioritize proper ventilation to minimize mold growth. Implement effective ventilation strategies by opening windows and doors to promote airflow. Use fans to improve air circulation, directing them towards damp surfaces. If possible, employ dehumidifiers to reduce moisture levels in the air, which further inhibits mold development. Ascertain that any exhaust fans in the area are operational—this will help remove humid air quickly. Furthermore, consider using air purifiers with HEPA filters to capture mold spores that may be present. By maintaining consistent airflow and reducing humidity, you create an environment less favorable to mold growth, allowing for more effective remediation of the affected drywall.
Remove Moldy Drywall

Once you've confirmed the presence of moldy drywall, it's crucial to act quickly to prevent further damage and health risks. Start by wearing protective gear, including gloves and a mask. Carefully cut out the affected drywall using a utility knife, guaranteeing you remove a margin of at least a foot beyond the visible mold. Dispose of the moldy sections in a sealed plastic bag.
Here's a quick reference table for mold removal and drywall replacement:
| Step | Action | Notes |
|---|---|---|
| 1. Assess | Identify mold extent | Check adjacent areas |
| 2. Cut | Remove drywall | Use a utility knife |
| 3. Discard | Seal and dispose of moldy pieces | Prevent spore spread |
| 4. Dry | Confirm area is completely dry | Use fans if necessary |
| 5. Replace | Install new drywall | Follow manufacturer's guidelines |
Clean the Surrounding Areas
After removing the moldy drywall, it's essential to clean the surrounding areas to eliminate any lingering mold spores and moisture. Start by vacuuming the affected space with a HEPA-filter vacuum to capture tiny spores. Next, prepare a cleaning solution using water and a mold removal agent, like vinegar or hydrogen peroxide. Apply the solution to surfaces using a sponge or cloth, ensuring you cover all nooks and crannies. Don't forget to clean any tools used during the drywall removal, as these can likewise harbor spores. Allow the area to dry completely, as moisture can lead to further growth. Finally, consider using a dehumidifier to maintain low humidity levels, preventing mold from returning.
Treat the Remaining Surfaces
With the surrounding areas thoroughly cleaned, it's time to treat the remaining surfaces that may have been affected by moisture or mold spores. You'll want to use effective mold treatment methods to guarantee long-term prevention. Here are some practical steps:
- Apply Anti-Microbial Solutions: Use products specifically designed to kill mold spores on surfaces.
- Utilize Surface Cleaning Techniques: Scrub surfaces with a mixture of water and detergent, followed by a rinse.
- Seal Vulnerable Areas: After cleaning, consider sealing surfaces with a mold-resistant primer or paint.
- Monitor Humidity Levels: Keep humidity below 60% using dehumidifiers to prevent future mold growth.
Dry the Affected Space
To effectively dry the affected space, you should use fans to circulate air and reduce moisture levels. Position the fans to maximize airflow across damp surfaces and promote faster drying. Moreover, employing a dehumidifier will help extract excess humidity, further preventing mold growth on your drywall.
Use Fans Effectively
Using fans effectively can greatly expedite the drying process of drywall after water damage, preventing mold growth. To optimize your drying efforts, follow these steps:
- Choose the Right Fan Types: Use high-velocity fans for maximum airflow.
- Position Fans Strategically: Place fans near the wet drywall, ensuring they face the affected area.
- Adjust Airflow Direction: Angle fans to circulate air across the surface of the drywall, promoting evaporation.
- Create Cross-Ventilation: Open windows or doors to allow fresh air in, enhancing airflow and reducing humidity levels.
Dehumidify the Area
After maximizing airflow with fans, it's time to focus on dehumidifying the area to further reduce moisture levels. Effective humidity control is vital for preventing mold growth. When selecting a dehumidifier, consider the size of the affected space, the humidity level, and the dehumidifier's capacity. Here's a comparison of options:
| Dehumidifier Type | Ideal Room Size (sq ft) | Daily Capacity (pints) |
|---|---|---|
| Small (Portable) | Up to 500 | 30 |
| Medium | 500 – 1,500 | 50 |
| Large (Basement) | 1,500 – 3,000 | 70 |
| Commercial | 3,000+ | 100+ |
Choose a dehumidifier that fits your needs to effectively combat moisture and safeguard your space.
Prevent Future Mold Growth

While addressing mold growth on drywall after water damage is crucial, taking proactive measures can greatly reduce the risk of recurrence. Implementing these strategies will help you maintain a mold-free environment:
- Use mold resistant materials during repairs, such as moisture-resistant drywall and paints.
- Guarantee proper ventilation in high-humidity areas like bathrooms and kitchens to reduce moisture accumulation.
- Conduct regular inspections of your home, focusing on basements, attics, and areas prone to leaks.
- Monitor indoor humidity levels, keeping them between 30-50% using dehumidifiers if necessary.
Consider Professional Help
Even with preventive measures in place, mold can still pose a significant challenge, especially if the water damage is extensive. If you notice persistent mold growth on your drywall, it's vital to evaluate professional help. Mold remediation experts possess the necessary training and equipment to safely and effectively remove mold from your home. They'll conduct a thorough assessment to identify the extent of the infestation and any underlying water issues. Moreover, an expert consultation can provide tailored solutions to prevent future outbreaks, ensuring your home remains safe and healthy. Attempting to tackle severe mold problems on your own can often worsen the situation, making professional assistance the most effective route for long-term resolution.
Monitor for Recurrence
To guarantee your home remains mold-free following remediation, it's essential to actively monitor for recurrence. Regular vigilance will help you catch any mold recurrence signs early. Implement the following moisture monitoring techniques to maintain a healthy environment:
- Inspect Areas: Regularly check areas prone to moisture, like basements and bathrooms.
- Use a Hygrometer: Measure humidity levels; aim to keep it below 60% to deter mold growth.
- Check for Leaks: Routinely examine plumbing and appliances for leaks that might lead to dampness.
- Airflow Management: Ensure proper ventilation in high-moisture spaces to reduce condensation.
Conclusion
In summary, addressing mold growth on drywall promptly is essential for your health and safety. Did you know that about 30% of buildings in the U.S. have moisture problems, creating ideal conditions for mold? By identifying the moisture source, removing affected materials, and implementing preventive measures, you can greatly reduce the risk of mold recurrence. Don't hesitate to seek professional help if needed, as tackling mold effectively protects both your property and your well-being.